now blogging at www.katesplates.com.au


1 Comment

Lunchbox Muffins

If you’re anything like me, you’re always looking for creative ways to add nutrition to lunchboxes!  One of my favourites is the savoury muffin – they’re quick and easy and there are endless combinations to suit your kids’ tastes. I have found one trick that seems to work … I always use bacon, salami or chorizo in my savoury muffins to boost flavour – they risk tasting bland without something strong. For a vegetarian option, olives are ideal.  Stick to the basic recipe below and from there, you can add whatever cheese your kids like (cheddar, feta, ricotta, parmesan) and hide lots of vegies (spinach, carrot, zuccini, onion etc).   Would love to hear what combinations you come up with … here’s a few suggestions to get you thinking:

* Spinach and Ricotta

* Chorizo, Cheddar and Spinach

* Bacon and cheese

* Capsicum,  Olive and Salami

* Zuccini, Bacon and Carrot

green lunchbox muffins

Lunchbox Muffins – Base Recipe

Ingredients – makes 16 muffins

150gms of cheese, grated
2 eggs
150gms bacon
350gms French flour
2 tsp baking powder
1/2 onion, finely diced
large handful baby spinach leaves
1 tbsp fresh herbs of choice
250gms milk
1 tbsp olive oil

Method

Preheat the oven at 180 degrees.

Saute the onion and bacon/salami for 5 minutes until just cooked.  Put all the ingredients into a food processor and process until combined.

Spoon tablespoons into a well-greased muffin pan (N.B I have tried with paper wrappers and without and find without is best.  The kids complained of the wrappers sticking to the muffin which means they don’t bother eating it).  Bake for approx 25 minutes or until golden brown.

These freeze really well.  They’re also great to reheat in the oven for at-home lunches.  You may choose to cut them in half horizontally and spread with cream cheese or marscapone.

With grace and gusto,

kpx


2 Comments

Olive Tapenade Scrolls

A busy week so far!  Didn’t think I’d have time to blog but I couldn’t resist throwing this one up quickly because I was so pleased with how quick and simple (and yum!) they were.  I’m one of those lucky mums whose kids love olives.  Yes they have expensive tastes but olives are so versatile and can really lift a dish – whether it’s a main meal or a mid-morning snack.

We have sports day this week which means us parents have a great excuse to get together for a picnic and watch the kids run around the oval.  But it also means I need to feed the whole family!  So these scrolls came to mind … I’ve never made them before but they were so easy.  I used this olive tapenade to give it a boost of flavour and it means I don’t have to make boring old sandwiches.  You could use a variety of different olives to change the flavours … many tapenades call for anchovies but I find the flavour a little too strong for kiddies, so almonds are a good substitute to let the olives shine through.

Olive Tapenade

Ingredients

2 cloves of garlic (if you don’t like a strong garlic flavour, drop it back to 1)
1/2 bunch parsley
6-8 sprigs chives
40 gms whole almonds
200gms black kalamata olives, pitted
20-40gms extra virgin olive oil
cracked black pepper to taste

Method

Place the herbs and garlic in a food processor or Thermomix and process until finely chopped (TM31 speed 7 for 3 secs).

Add the almonds and olives and process (speed 7 for 5 sec) until you reach your desired consistency.

Add the EVOO and pepper and process to combine.

olive tapenade scrolls_logo

Olive Tapenade Scrolls

Use the french flour bread recipe to make your dough.

Once you have left the dough to prove for 30-60mins, cut into 16 balls.

Roll out each ball to a sausage shape and then flatten gently with the palm of your hand.

Using a small spatula or icing knife, spread a layer of olive tapenade along one side of the dough.

Roll one end to the other to create your scroll and place on a baking tray lined with baking paper.

Continue with the remaining 15, and spray the tops with water before cooking at 220 degrees for about 30 minutes or until golden brown.

These will freeze really well and are a great afternoon tea.  For a nut-free version for lunchboxes, omit the almonds or substitute for anchovies.

With grace and gusto,

kpx


2 Comments

Nut-free Coconut and Cranberry Fudge

I’m quite chuffed about this recipe … the brilliant Jo Whitton has done it again with her Quirky Cooking Thermomix cookbook.  I’ve made it a few times now with different versions and I’ve settled on cranberries as a quick and easy substitute for dried sour cherries.  I don’t know about you but I don’t stock these in my pantry very often.

So this is a sugar-free fudge that honestly is prepared in 5 minutes and only takes an hour to set in the fridge – no baking or overnight chilling required.  It’s ingenious in it’s simplicity and allows lots of flexibility to change up the dried fruit (or nuts – I’m thinking pistachios for Christmas time!) to suit your family’s taste.  In this batch, I did half dried cranberries and half goji berries for added nutrition.  You could substitute these for sultanas, chia seeds, currants, pepitas, sunflower seeds, cacao nibs or nuts if you’re keeping them at home.  Yum!!

Coconut Fudge_logo

Coconut & Cranberry Fudge

Ingredients

400gms desiccated, shredded or flakes of coconut
30gms coconut oil
1 tsp vanilla extract
70gms pure maple syrup
40gms dried cranberries
40gms goji berries

Method

You will need a Thermomix or a good quality food processor.

Put the desiccated coconut into the food processor or TM and blend until a paste forms (in the TM this is about 1-2 mins at speed 8).  Scrape down the sides with a spatula and add the coconut oil … pulverise for 1 min on speed 8.  It should be quite liquid now.

Add the dried fruit, vanilla and maple syrup and mix on reverse speed 3 for 10 seconds.  If you don’t have a Thermomix, just stir it together in a bowl.  It will come together as a crumbly solid.

Pour mixture into a lined 20-25cm slice tin and smooth with a spatula.  Score into small squares – it makes cutting it later a lot easier.  Refrigerate for an hour before cutting and serving.  Lovely as an after-dinner snack with green tea.

Would love to hear what other versions you come up with!

With grace and gusto,

kpx


2 Comments

Nut-free dark chocolate and banana muffins

Here’s another winner with the kids … I tested them in the lunchbox today and by the look of my daughter’s chocolate-smeared grin when I picked her up from kindy this afternoon, these get the kid tick of approval!

I find it so helpful to bake up a double mixture of these and stock the freezer – it makes that morning rush so much easier and you look like a pro if anyone “drops in” for morning tea.  Use really good quality dark chocolate (at least 70%) to maximise nutrition and you could even hide some chia seeds or maca powder in these without affecting the taste.

banana choc muffins_logo

Dark Chocolate and Banana Muffins

Ingredients

4 medium over-ripe bananas (the riper they are the sweeter they are)
3 large free-range eggs
1/3 cup (60gms for Thermomixers) macadamia oil
1/4 cup (50gms) coconut sugar
1 tsp vanilla extract
2 cups (340gms) flour (I used Imported T65 french flour)
2 tsp gluten free baking powder
1/2 cup desiccated coconut
1 tsp ground cinnamon
pinch good quality sea salt
100gms dark chocolate, finely chopped (or grated on speed 8 for 4 seconds in the TM)

Method – makes 12-15

Preheat the oven to 180 degrees fan forced.  Line your muffin trays with paper cases.

If you’re using a Thermomix, mix your bananas, eggs, oil and vanilla on speed 5 for 5 seconds to combine.

Non-thermomix users – mash your banana and stir in all other wet ingredients to combine.

Add remaining dry ingredients, reserving a third of the grated chocolate, and combine at speed 3, reverse for 10 seconds. Use your arm muscles and a spoon if you don’t have a TM.

Spoon the mixture into the paper cases, half filling them and finish by sprinkling the dark chocolate over the top.  Bake for 30 minutes and cool on a wire rack.  Eat fresh or freeze for lunchboxes.

With grace and gusto

kpx


1 Comment

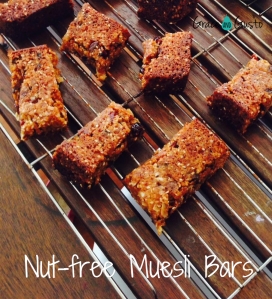
Nut-free muesli bars

My kids love their nuts and it’s a challenge to find nut free choices to pack in the lunchbox … but the rules are there for good reason, so I played around with a new slice recipe to keep the kids interested.  Hope this goes down well in your household too!

nut free muesli bars_logo

Nut-Free Muesli Bars

Ingredients

120gms organic butter
1/4 cup raw honey
1/2 cup quinoa flakes
1/2 cup SR flour
1/2 cup coconut sugar
1/4 cup dried cranberries
1/4 cup dried goji berries
1/4 cup coconut flakes
2 tbsp sesame seeds

Method

Preheat the oven to 180 degrees.

Melt the butter and honey together on low heat.  If you’re using a Thermomix, melt for 2 minutes at 60 degrees, speed 2.

Add all the dry ingredients and stir to combine.  In the TM, use reverse for 30 seconds on speed 3.

Transfer to a slice tray and bake for 20 minutes at 180 degrees or until golden.  Allow to cool and cut into muesli bar or slice shapes.

Best to store in the freezer and in hindsight I would have doubled the mixture as they disappeared too quickly!  You can easily substitute the berries for sultanas or seeds, the quinoa flakes for oats and the coconut sugar for rapadura or raw sugar if you prefer.

With grace and gusto,

kpx


1 Comment

Food … the great connector!

Back to school tomorrow!  My freezer is stocked, lunchboxes are packed and I’m feeling ready for the week ahead.  I even managed to squeeze in some cooking this afternoon that means most of the week’s dinners are ready to go.  Don’t you just love it when you feel like you’ve got a head start?  It’s rare in this household so I shall revel in it while it exists.  Hubby told me this evening that I was a “Susie Homemaker Nerd”.  I took that as a huge compliment!  Over the next couple of days I will share some of my lunchbox ideas baking recipes but for now, I wanted to share something I wrote a few weeks ago …

butter dish_quote

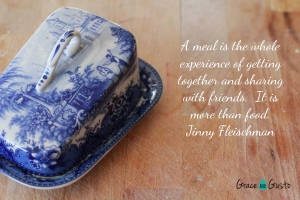
I learnt a valuable lesson today that I felt compelled to share with you.  Contrary to my most frequent conversation topic, I have decided that sometimes … it’s not about the food.  It’s actually more about the conversation.  We’ve all heard that it’s not about the bike … it’s the challenge.  It’s also not about the outfit … it’s your presence.  It’s not about the hair or make up … it’s just about you being there.

I am preparing for a dinner party tomorrow night for ten people … it’s something I really love to do.  I love spending time in the lead up planning what I’ll serve and balancing the menu so it flows well.  I think about the atmosphere, the music, how well my guests will connect with one another.  I consider my timing of the night to make sure no one is ever hungry or thirsty … but also not so full that they can’t manage dessert.  It’s all the thinking and creative design that goes into a night that I really love.  But I stopped myself this week and realised I got so caught up in how complicated a dish was getting that it meant I would miss conversation at the table and time lingering over a glass of wine with friends.

Something I love to do is bring homemade goodies to share with girlfriends when we get together.  I was on my way to one such meeting this morning and I was cursing that I hadn’t had time to prepare something to take.  And almost as soon as I walked in the door, it hit me that I just needed to turn up – that is was more important to someone else this morning that I just be there – with or without food to share.  I’m so glad I shook the disappointment off quick enough to notice the look in a friend’s eyes that told me she didn’t give two hoots about a piece of cake … she just needed someone to be there for her and to listen.  Food would have been a distraction and I would have missed a huge opportunity to make a difference.

Earlier in the week I took a surprise birthday cake for a friend to a get together.  Again – I spent way too much mental anguish over the fact that I had bought a cake and not made one.  We’d all eaten dessert by the time the cake came out so once again, the type of cake was irrelevant – the most important thing was that the cake was more like a handwritten note that said “I know it’s your birthday, I care about you, and you deserve to be spoilt”.  That’s what really mattered.

So although us foodies do talk about, think about and create food A LOT, I’m here to say that I don’t take for granted the people I get to share it with.  They’re more important than the food … what’s a dinner party without guests?

With grace and gusto,

kpx